

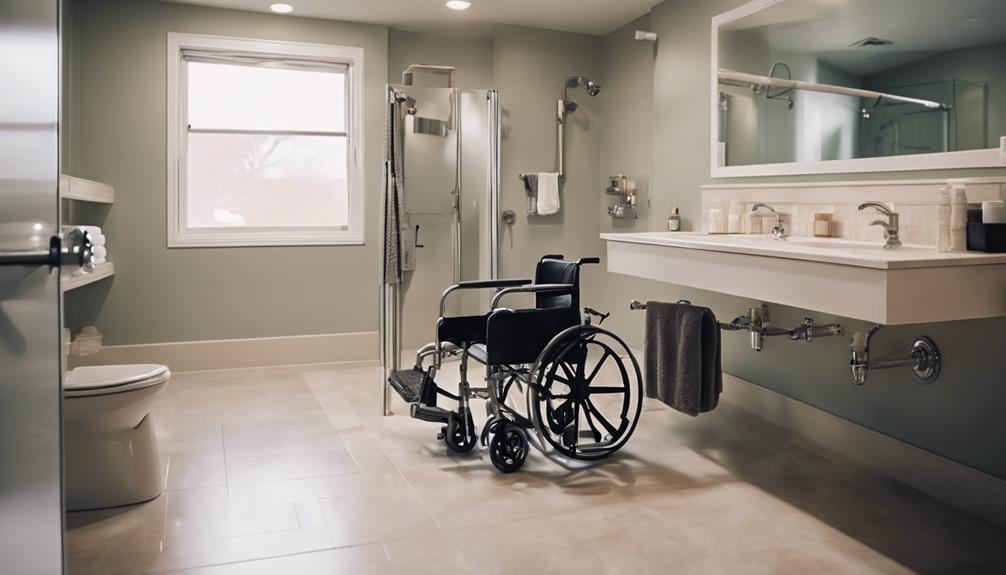
When remodeling your bathroom for ADA compliance, start by ensuring doorways are at least 32 inches wide for easy access. Your bathroom should provide at least 60 inches of turning space. Install sinks no higher than 34 inches and ensure they have under-sink knee clearance. Position mirrors so their bottom edge is no higher than 40 inches off the floor. Appropriately place and install grab bars near the toilet and in the shower, which should also have accessible features. Consider non-slip flooring for safety and lever-style handles for easier operation. With these changes, you'll set the stage for a safer, more accessible environment.
Understanding ADA Dimensional Standards
To comply with ADA guidelines, it's crucial that you understand the dimensional standards set for bathroom layouts. These regulations ensure that facilities are accessible to everyone, including those with disabilities. You'll need to focus particularly on the spatial configuration and the clearance requirements.
Firstly, doorways should have a minimum width of 32 inches when the door is open at 90 degrees. This width allows wheelchair users to pass through easily. Additionally, there should be at least 60 inches of turning space within the bathroom. This space is essential for a person in a wheelchair to maneuver comfortably.
It's also important to consider the placement of fixtures like sinks and mirrors. Sinks should be mounted no higher than 34 inches from the floor, and there must be a knee clearance of 27 inches high, 30 inches wide, and 19 inches deep.
Mirrors should be positioned to give a view from both standing and seated positions, which generally means the bottom edge of the reflective surface shouldn't be higher than 40 inches above the floor.
Ensuring Proper Toilet Accessibility
While planning your ADA-compliant bathroom remodel, you'll need to focus on toilet accessibility to ensure it meets all necessary guidelines. First, consider the placement and space requirements. You'll need at least 56 inches from the rear wall and 60 inches in diameter for a wheelchair to turn around easily. This space is crucial for maneuverability and comfort.
The height of the toilet is also key. It should be between 17 to 19 inches from the floor to the top of the seat, allowing for easier access for those in wheelchairs.
Don't forget to install grab bars; they're essential for support and safety. Position them on the wall nearest the toilet and on the adjacent walls, at the appropriate heights of about 33 to 36 inches from the floor.
You'll also want to ensure that the flush control is on the open side of the toilet, within arm's reach, and no higher than 44 inches from the floor. This placement helps those with limited mobility maintain independence and ease of use.
Installing Accessible Sink Features
After ensuring your toilet area meets ADA standards, focus on the sink to maintain a fully accessible bathroom. You'll want to consider several key features to ensure your sink is accessible for all users, particularly those in wheelchairs.
First, the height of the sink is crucial. It shouldn't exceed 34 inches from the floor to the top of the sink. This height ensures that someone in a wheelchair can comfortably use the sink without it being too high.
Additionally, make sure there's enough clearance underneath the sink. A minimum of 27 inches high, 30 inches wide, and 11 to 25 inches deep from the front edge allows for wheelchair accessibility.
The faucet is another important feature. Opt for lever-operated, push-type, or electronically controlled mechanisms that are easier to use for individuals with limited hand strength. Ensure that the faucet controls are within reach from a seated position, and don't require tight grasping, pinching, or twisting of the wrist.
Lastly, the placement of soap dispensers and hand dryers should also be within easy reach. Install these accessories no higher than 48 inches from the floor and close to the sink to aid usability.
Selecting Appropriate Grab Bars
Selecting the right grab bars is essential for maintaining safety and independence in an ADA-compliant bathroom. When you're choosing these features, you'll need to consider their material, diameter, and placement to ensure they meet accessibility standards and personal needs.
First, focus on the material. Stainless steel is a popular choice due to its durability and resistance to corrosion. You'll want to avoid materials that might degrade with moisture or become slippery when wet.
The diameter of the grab bars should be between 1.25 and 1.5 inches to provide a secure grip. This size is ideal to accommodate various hand sizes and strengths, making it easier for users to hold on securely.
Placement is crucial. Grab bars should be installed where you'll need them most. Common areas include next to the toilet and along the bathroom walls where support is needed for transitioning.
They should be mounted at a height that's accessible to all users, typically between 33 and 36 inches from the floor.
Lastly, ensure the grab bars are securely anchored to the wall to support at least 250 pounds of weight, complying with ADA guidelines. This ensures they can accommodate a wide range of users without risking safety.
Designing ADA Compliant Showers
Designing an ADA-compliant shower involves careful planning to ensure accessibility and safety for all users. You'll need to focus on several key features to meet these requirements.
First, consider the shower's entry. It's crucial that there's no curb to step over. A curbless entry not only minimizes tripping hazards but also accommodates wheelchairs and walkers effortlessly.
Next, think about the shower controls. Position them between 38 inches and 48 inches from the floor, and ensure they're easily operable with one hand. Lever-type handles or touch-operated controls are ideal as they require less dexterity and strength to manipulate.
The choice of a shower seat is also essential. You should opt for a fold-down seat mounted between 17 inches and 19 inches from the floor. This setup allows for flexibility and aids those who need to sit while showering. The seat should be sturdy and slip-resistant to enhance safety.
Providing Sufficient Maneuvering Space
While considering the layout of an ADA-compliant shower, it's equally important to ensure there's enough space for easy maneuvering. You've got to consider both the space within and around the bathroom fixtures. For a wheelchair to turn comfortably, an open space of at least 60 inches in diameter is required. This circular clearance lets someone in a wheelchair rotate 180 degrees, which is crucial in smaller bathrooms.
When planning your layout, remember that you'll need to maintain this clearance in areas around the toilet, sink, and shower. Don't just measure the open space; think about how doors swing and how someone might move from one fixture to another. It's not just about fitting a wheelchair; it's about ensuring a fluid, natural movement for the user.
Also, ensure there's ample space under the sink and around the toilet. This isn't just for comfort, but for accessibility in transferring from a wheelchair to the toilet.
Keep pathways to each fixture clear of any barriers. This means avoiding placing trash bins, racks, or storage in pathways that could hinder movement. Clear, unobstructed paths are key to a truly accessible bathroom.
Incorporating Accessible Door Solutions
Incorporating accessible door solutions into your ADA bathroom remodel is crucial for ensuring that everyone, regardless of mobility, can enter and exit with ease. Start by choosing doors that are at least 32 inches wide when open at 90 degrees, providing ample space for wheelchair access. Opt for lever-style handles instead of knobs, as levers are easier for hands of all strengths to operate.
You should also consider the door's swing direction. An outward-swinging door is preferable in small bathrooms to maximize internal space. If an outward swing isn't possible, ensure there's enough room inside for a wheelchair to maneuver when the door swings inward.
Don't forget the threshold; it should be flush with the floor to prevent tripping and facilitate wheelchair crossing. If there's a need for a raised threshold for water containment, make sure it's beveled and no higher than half an inch.
Automatic door openers can be a game-changer for users with limited mobility. Installing one might seem like a splurge, but it's a feature that significantly enhances accessibility. Remember, every detail in your ADA bathroom remodel counts towards creating a barrier-free environment.
Frequently Asked Questions
How Often Do ADA Compliance Standards for Bathrooms Get Updated?
You're wondering how often ADA compliance standards for bathrooms are updated. They're typically reviewed every few years, but changes can be influenced by technological advancements or shifts in accessibility advocacy. Stay informed to remain compliant.
Are There Tax Benefits for Making Ada-Compliant Bathroom Renovations?
Yes, you may qualify for tax benefits when you make ADA-compliant bathroom renovations. These can include deductions or credits aimed at offsetting costs associated with ensuring accessibility. Always consult a tax professional for specifics.
Can Existing Bathrooms Be Grandfathered in Under Old ADA Standards?
No, existing bathrooms generally can't be grandfathered under old ADA standards. You'll need to update them to current standards to ensure accessibility and compliance, especially during significant renovations or when altering usage functions.
What Are Common ADA Compliance Mistakes in Bathroom Remodels?
Common mistakes you might make include insufficient door widths, improper grab bar placements, and incorrect toilet heights. Make sure you're also considering the sink clearance and mirror height to avoid these pitfalls.
How Do ADA Requirements Vary Between Public and Private Bathrooms?
ADA requirements differ significantly; public bathrooms must meet strict accessibility standards, whereas private ones have more flexibility unless they're part of a business or public facility. You'll need to check local regulations for specifics.
Conclusion
Now that you've got the basics, it's your turn to make sure your ADA bathroom remodel ticks all the boxes. Remember, every feature counts—from the height of the sink to the placement of grab bars. Give each element thoughtful consideration to ensure accessibility and comfort. With these practices in place, you'll not only comply with ADA standards but also create a space that's welcoming for everyone. Go ahead, transform that bathroom into a model of inclusivity!
Related articles: Why Comply With OSHA Standards in Bathroom Remodeling? · 3 Key OSHA Standards for Construction Site Safety · Top 5 OSHA Standards for Construction Site Safety






Leave a Reply